

Buy the PCB:

DOCUMENTS:
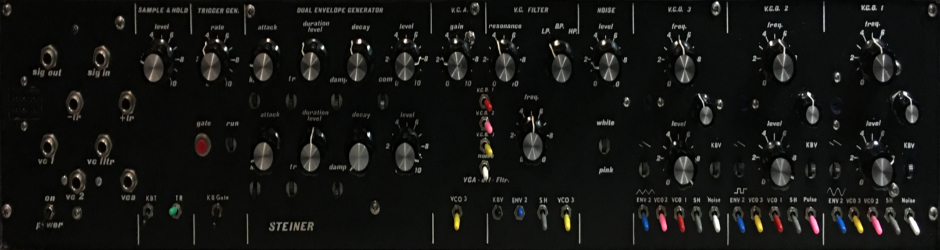
FUNCTION:
This module creates a train of triggers/gates whose frequency can be set manually or controlled by an external voltage. The duration of each trigger/gate can also be set manually or controlled by an external voltage.
You can also create a single trigger manually or a train by pushing and holding down the appropriate button.
S-Triggers/Gates versus Voltage Triggers/Gates:
Traditionally, a trigger is a short duration pulse which starts or synchronizes some other event. A gate is traditionally associated with a key down event and can be of arbitrary length. A gate, too can synchronize or initiate an event, but can also maintain the state of some other module until it is released. For example, the Triple EG, type ENVDL, will maintain the Duration level while a gate is active on the input.
Steiner modules use S-Triggers/Gates by design. This re-issue adds the ability to build these modules to use Voltage Triggers/Gates.
S-Triggers are typically “floating” and then drop to a ground potential when active. Electrically, an S-Trigger is connected to the collector of an NPN transistor. The emitter of the transistor is connected to ground. When the transistor is off, the collector floats; an “open” collector. When the transistor is on, the collector to emitter creates a low resistance path to ground. In some cases (often in the re-issue designs) the collector is connected through a resistor to +12 volts. When the transistor is off, no trigger/gate, the collector (output) is effectively at a 12 volt potential. When on, the collector is at ground potential as without the pull-up resistor.
The advantage of S-Triggers/Gates is that multiple outputs can be tied together without fear of damaging the circuit when one output is active. That is, you can “OR” the outputs together without any additional circuits. This means that a trigger input can be connected to multiple trigger sources. On the sequencer, the “Clock In” can also be a “Clock Out”. You can’t do this with Voltage Trigger/Gate outputs. If you do, you will likely damage the output stage of the other connected outputs. You have to have some type summing buffer to do that.
Most modern equipment (all of it probably) uses Voltage Trigger/Gates. The trigger/gate is active when there is a positive voltage present. Most of the equipment I’ve seen will respond as soon as a minimum level is reached, typically 5 volts. To be compatible with modern equipment, I added a simply conversion circuit to the PCBs on all the trigger ins/outs so you can choose which to use. The way they are added, you can keep both if you want to.
From the Synthasystem Manual:
Triggers are the command signals of the system and are electronically equivalent to a grounding switch. See figure #20 part A for a graphic representation of this analogy.
Two or more trigger sources can be connected together in parallel, or as computer designers say, “WIRE ORED” together.
Triggers can be of any length in duration, from very short to very long. The STEINER-PARKER Basic Studio and Synthasound units typically produce and use triggers ranging from a few 1/1000ths of a second to greater than ten seconds. Whereas some of the modules requiring a trigger input do not care whether the trigger is short of long (such as the S&H and the sequencer input), other modules requiring a trigger input are sometimes controlled by the trigger duration (such as the envelope generator).
Two trigger sources connected in parallel are like two switches in parallel. When one trigger source is ON, the other had no effect. Therefore, one trigger source can act as an inhibitor to recurring triggers from another trigger source. See figure #20, part C.
The trigger generator can produce triggers of varying duration and rate. The rate is controlled by the rate knob and or a voltage fed into the V.C. Rate Jack. Trigger duration is controlled with the Duration Knob and or voltage fed into the V.C. Width jack.
The trigger gen can be made to run in one of three ways.
- Put the free run switch to the RUN position (up).
- Push the button marked GATE while the free run switch is in the OFF (down) position.
- Finally, you can feed a long trigger into the jack called position. The generator will run for the duration of the input trigger.
Iin this mode, manual triggers can be generated by pushing a button marked Man. Trig. The trigger duration in this case is continuous for as long as the button is pushed.
The trigger generator output is connected to four output jacks in parallel to facilitate ease of patching.
Here is the figure:

USE:
Inputs/Outputs:
This module has 3 inputs and 1 output:
- VC Rate – A voltage here will control the rate and is summed with the Rate knob.
- Trig/Gate – A trigger/gate here will cause the Trigger Generator to run while this input is active.
- VC Duration – A voltage here will control the duration or width of the trigger
- Trigger Outputs – 4 jacks in parallel for outputs
Knobs:
This module has 2 knobs:
- Rate – This knob controls the frequency of the trigger train.
- Duration – This knob controls the duration of each trigger/gate
Switches:
This module had 3 switches:
- Gate – Holding this button creates a trigger/gate train as long as it is down.
- Run – A toggle switch which starts/stops the train. The same as the Gate switch, except you don’t have to hold it.
- Manual Trigger – A push button which creates a single trigger whose duration continues until the button is released.
GENERAL CONNECTIONS:
Quoting from the Synthasystem manual:
Triggers are the command signals of the system and are electronically equivalent to a grounding switch. See figure… [not included here].
Two or more trigger sources can be connected together in parallel, or as computer designers say, “WIRE ORED” together.
Triggers can be of any length in duration, from very short to very long. The StEINER-PARKER Basic Studio and Synthasound units typically produce and use triggers ranging from a few 1/1000ths of a second to greater than 10 seconds. Whereas some of the modules requiring a trigger input do not care whether the trigger is short of long (such as the S7H and the sequencer input), other modules requiring a trigger input are sometimes controlled by the trigger duration (such as the envelope generator).
Two trigger sources connected in parallel are like two switches in parallel. When one trigger source is ON, the other has no effect. Therefore, one trigger source can act as an inhibitor to recurring triggers from another trigger source. See figure … [not included here].
The trigger generator can produce triggers of varying duration and rate. The rate is controlled by the rate knob and or a voltage fed into the V.C. Rate jack. Trigger duration is controlled with the Duration knob and or voltage fed into the V.C. Width jack.
The trigger gen can be made to run in one of three ways. 1. Put the free run switch to the RUN position (up). 1. Push the button marked GATE while the free run switch is in the OFF (down_ position. 3. Finally, you can feed a long trigger into the jack called GATE, once again with the free run switch in the OFF (down) position. The generator will run for the duration of the input trigger, in this mode.
Manual triggers can be generated by pushing a button marked Man. Trig. The trigger duration in this case is continuous for as long as the button is pushed.
The trigger generator output is connected to four output jacks in parallel to facilitate patching.
COMPONENT SELECTION:
Resistors:
This module was originally built with carbon core, 5% resistors. So, you have a wide range of options here. I recommend using 1% tolerance, metal film resistors everywhere.
R32 is listed as a 2M value. This should be smaller. Long story, but the original schematic was 100k. Use 100k.
Capacitors:
There are probably a billion different ceramic capacitors at a place like Mouser. Pick a capacitor that can fit the hole easily, typically 0.1 inch on centers.
Pick good quality electrolytics where designated.
Transistors:
The original used 2N5172 NPN and 2N5138 PNP transistors. These are still available, but I could only find a “PN5138” which I think is the same transistor. In any event, you can use any standard NPN or PNP transistors and they should work.
This module has some paired transistors. I don’t think matched pairs are necessary, however, I laid them out using an 8 pin DIP package and list them as an SSM2210. You can probably just install 2 NPN transistors and call it good. You can certainly use highly matched pairs if you want to.
Originally, the Steiner modules used a 2N5163 JFET. In later modules, this was replaced with a 2N5246 JFET due to some quality problems with the 2N5163. The 2N5246s are still available and manufactured. Other JFETs will work here, too. I’ve tried some NTE equivalents for the 2N5163 which seemed to work fine. They are more expensive than the 2N5246s though and the 2N5246 is “vintage” :)
For a Unijunction Transistor (UJT), I found a NTE6409 works best. I’ve tried several different ones and they don’t work with the values Nyle specified. The original was a 2N4891, but they are out of production. You can get the NTE6409 at Newark/Farnell.
Don’t use a 2N4871. I found they stop oscillating at about a 4 second rate with the knob pointing at about 9 o’clock. The NTE 6409 part works all the way CCW and gives about a 10 to 20 second rate.
Don’t use a 2N2646. I found they don’t work quite right.
You can buy the 2n4891s at Nikko (aka Dalbani).
They are EXPENSIVE! But they seem to be the real deal. I bought some and they seem to work fine.
Diodes:
Nothing special, 1N4148s are fine.
Pots:
Your choice for your panel. If you use the panel I laid out, the holes and spacing will work for the Alpha 12 and 16mm pots. You can probably use nicer BTI, Bourns, etc. 9mm pots with “pot chiclets”
Trimmers:
Use good trimmers, please. A good Bourns multi-turn trimmer like Bourns 3296Y series will fit the pad layout and work well.
Jacks:
For the panel I laid out, a good 3.5mm or 1/8 inch jack will work. I use the Switchcraft 42A Tini-Jax true 1/8 inch jack. These are switched jacks and they work with 1/8 inch plugs and 3.5 mm plugs.
Switches:
I’m using an Electroswitch C5P0112N-A Mouser number is: 690-C5P0112N-A for the rotary switch. It can be set to any number of throws from 1 to 12.
BUILD NOTES:
Soldering:
I assume you know the basics of soldering. I like to insert the low lying parts first, like resistors, diodes, etc. After these, I install the IC sockets. Next capacitors, transistors, connectors. Use a good solder, either an organic flux, which you should wash regularly, or a no-wash flux.
Take a break every so often, wash off the flux if you are using a flux which required cleaning. Double and triple check orientations, pins, and solder joints.
Power Supply Regulation/Filtering:
Some additional comments here. These modules are tested to run on +/-12 VDC. The original power supply in the Synthasystem was +12/-10 VDC due to how Nyle designed the -10 volt section of the power supply, not for any magical requirement to have -10 volts.
The power/regulation section has 2 voltage regulators on it which can be set to +12/-10 (or +/-12 volts) depending on your needs. If you are coming from +/-15 volts, you need both regulators and you may as well set one to -10 volts.
If you are coming from +/-12 volts, technically you don’t need the regulators, but if you want, install the negative one and set it to -10 volts. The LEDs are not strictly needed. They are there to establish a base current draw so the regulators will work.
Important… if you don’t install the regulators, you have to install a jumper between pins 2 and 3 as shown on the Power/Regulation PCB or you won’t get power.
COMPONENT PLACEMENT:
Mounting:
This PCB has four holes to allow flexible mounting configurations. The spacing of these holes is such that it can be mounted parallel to a 14HP wide Euro panel.
CALIBRATION:
The calibration is reasonably straight forward.
- Set the Rate control to its midpoint
- Set the Duration control to its midpoint.
- Adjust the Width trimmer, R2, to get a trigger duration of 5 ms
- Adjust the Rate trimmer, R6, for an 85 ms rate
These numbers are not set in stone. I tried dozens of different UJTs of every part number which I could buy including about 15 different 2N4891s, so more than 100 different UJTs. Some will oscillate to a lower frequency than others and some had a better range. You need to play with the above calibration to get the low frequency end as low as you can get it. UJTs are just not the best VCOs and they have a limited oscillation range that will vary run to run.
PANEL NOTES:
There is nothing too special. I suggest using connectors on the PCB and jacks on the flying wires. The spacing and holes are setup for Alpha 16 mm or 12 mm pots. The jack holes are 0.25 inch in diameter.